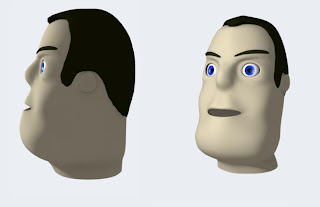
Final Render
The test renders werent quite as good as I expected so I tweeked a few features. For the walk cycle I referred to the link below for the anatomy of a walk cylce.
http://www.rubberbug.com/walking.htm/
The image below shows the improvement I made to the hips and shoulders of the character in the walk cycle.
For the secodn animation I just made simple improvement by deleting some of the faster motions that weren't really necessary. Doing this made the animation smoother. I also added some minor finger movements to add detail.
For the final animation I added movement to the teath and a chewing expression.
Thursday, 13 May 2010
Wednesday, 12 May 2010
Final animation test renders
Animation 1 - walk cycle
Animation 2 - toy observation
Animation 3 - Facial expressions
Face Rig and weight painting
Each bone was weight painted with varying weights around each time, this was very time consuming as the weights had to be very accurate to get the right parts of the mesh moving with the bones associated.
The image below shows an example of one bones weight painting.
The intention was to focus on animating the body but for the experience I decided to learn to rig a face. This was done by adding bones around the areas i wanted to animate and weight painting the boned around the areas. the weighting was mostly 50% weight so there weren't too many predominant areas being moved by specific bones.
The first attempt at rigging the face was very bad and ended up deforming the mesh. An image of this is shown below. the problem came from inaccurate weight painting.
Once the rig was completed correctly I decided to get some renders of facial expressions.
The final step was to try out an animation of the facial expressions. the video for this is shown below. There were some problems at the start of this video where the teeth were coming out of the bottom lip.
The video was adjusted slightly and the result is below.
Tuesday, 11 May 2010
Animation test
Once the character was rigged and all bones had been weight painted the model was animated in blender to test for any noticeable levels of crimping.
The next step was testing out a walk cylcle. For this I followed the link below from the blender website.
Blender walk cycle link
The video for the first walk cylce test is below.
Walk cycle second version.
The next step was testing out a walk cylcle. For this I followed the link below from the blender website.
Blender walk cycle link
The video for the first walk cylce test is below.
Walk cycle second version.
Adding an armature and weight painting
to animate the model the mesh of the character had to be weight painted to the mesh. With previous experience in animation and modelling no tutorials were followed. Once the armatures was constructed the armature and mesh were connected through a modifier, then the in pose mode bones were selected individually, then the mesh was selected in weight paint mode and weights ranging from 25% and 100% were applied to the correct areas of the bone. Ends of large bones were weighted with 25% to cure crimping issues when animated.
The image below shows some issues when weight painting. Some parts of the mesh were hidden so they had to be weight painted from a different angle that made them visible.
Final model modifications
For the prop in the second animation I decided to use a buzz lightyear toy. I had a basic model of buzz light year which I modelled in my spare time so I decided to modify this model and add it to the animation as a prop.
The before and after of the model are below.
The final changes to the main character bob are shown in the image below. The final adjustments to be added were teeth, a tongue, a mustache and a hat.
The image below shows bob fully textured and ready to rig. The next stage will be weight painting the model mesh to an armature.
Saturday, 20 February 2010
Character Modelling
The model was textured with face select and applied colours within blender. The eyes were given specularaty and reflectiveness to create a more realistic look.
This model was built so far with a simply technique of starting with a basic cube, extruding slightly down to the cheek bone then down and back inwards for the start of the neck. once the general shape was the the shape was subsurfed, once applied this subdivided the mesh giving more vertices to work with and a more rounded mesh. Once some vertices had been pulled in and out to fit the shape of the facial features the mouth and eye holes were cut out and eyes were placed in.
The hair and eye brows were created as a separate object with very few vertices.
Change of plans
With no initial knowledge of the project specs until late stages of the semester the project had to be changed to meet the requirements of the module. The aim is not to create 3 10 second clips based on real video footage.
Character Traits
Bob's Traits
- Hard working
- Honest
- Low self confidence
- Lonely
Merve's Traits
- Sneaky
- Moody
- Bad natured
- Confident
Character Art
Merve is just looking for the opportunity so take advantage of someone with money. He spends his days preying on people and begging. He lost everything when he got in over his head with a mega casino in Las Vegas. His family left him, he lost his home.
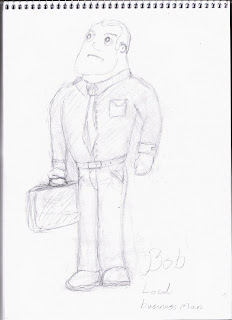
Bob is the main character in the short animation. He's a hard working business man who manages a small computer company in New York city. He's a single man with no children. He often uses a peaceful walk home to help relax him from the stresses of his working day.
Friday, 12 February 2010
Video Analysis
For the first animation I would like to do a walk cycle so for my video analysis I will try to pick out aspects which will be important to focus on in my animation. The video below is the reference video I decided to use for behaviour research.
The second animation is going to be a character noticing something on the floor and picking it up for closer observation. the video for this was recorded especially for this animation just to get an idea of how people behave when looking at something. The actor in the video is a fellow student.
The final animation will be a short series of facial expressions so for this I searched on youtube for an example of already existing 3D facial animations to get an idea of how other people have animated faces. the video below shows a series of different expressions.
Introduction To 3D Character Animation
I also like the style of pixar, My character will eventually represent one of these styles. The image below shows the pixar style I like.
Subscribe to:
Posts (Atom)